Sunday, November 18, 2012

Remember me?

  Yeah- I'm the guy who used to have a blog about taking a '51 Chevy from rustbucket to dreamboat. And then I stopped. Let me give you some of my lame excuses for my two month delay since the last post:

  On August 6th, the day of my last post, I started a new job. Not only a new job, but also a move to day shift. I haven't been on day shift since 2001, so readjusting my schedule has taken some time. In addition, the new job likes to develop their employees, so I've spent three weeks out of town for training.

  Also, two years of building and disassembling the car, and collecting parts has taken a toll on the space in the garage. In other words- I was getting cramped.

  In the time since I last posted, I have made progress on the car, but I've also cleared out some room in the garage, and started reorganizing the heck out of the place. I'll soon be bringing home my english wheel, which will increase my metalshaping abilities.

  Anyway, on to some progress!

  In the last post, you saw where I'd removed the lower front section of the quarter panel on the driver side. The next step was to temporarily attach the new section so I could see the extent of the work neded to the wheelhouse.

Even temporary, this looks like progress!
 
  The next step was to rebuild the inner wheelhouse, which was just as rusted as the outer sheetmetal.
 
                   A lot of extra meat around the flange, but that's OK- we know how to cut it.

 Getting the wheelhouse back to solid. Pay attention to how close the toolboxes are to my back as I work.
 
 
  Look at the oldskool torch welding!
 
  The last day of September, I was preparing to head to Ohio for two weeks of training, but it was also the last day of the Ducktail Run 2012.
 
 
  Im pretty sure this car belongs to Ron Fowler. Ron is truly the real deal with respect to traditional hot rodding. He's also the guy I bought my Olds hubcaps from


  Studebaker pickup in bare metal. "Nudebaker."
 
 
  And we made a nice score at the swap meet while we were there: 1955 (or '56) Chevy steering wheel in very workable shape. Paid about half of what they bring on eBay.
 
 Back at the ranch, I paused the reorganization for a couple of days, simply because I HAD to work on the car some.
 
 
  If you notice, there's already more room to work, and I'm not even done with the rework of the shop.
 
 
  Here's a neat piece you'll never see when the car is finished. This is the outside of the wheelhouse. In addition to fixing rust at the bottom, it eliminates the factory access hole, and will provide a bit more tire clearance. I'll need that when we lower the ride height in the rear.


Monday, August 6, 2012

Rumors of my death...

  The famous quote from the Old Articulator seemed rather fitting. It's been 2 months since the last posting. I didn't die, and I didn't lose interest and stop working on the car!

  A LOT has gone on between the end of May and now. Both on the car, and enough Non-Chevy stuff has gone on to keep me from being in the garage quite as much as I'd like. Let's take it from Late May:

  On race day (for those of you who did not grow up in Indianapolis, the term "race day," used by itself means only one thing: The Sunday before Memorial Day.) We made our annual pilgrimage to our favorite car show: Beatersville in Louisville Kentucky. Held in a historic district on Louisville, the show centers around the Phoenix Hill Tavern, which dates back to the 1800's. A beautiful setting for a show, and the cars are always winners

 
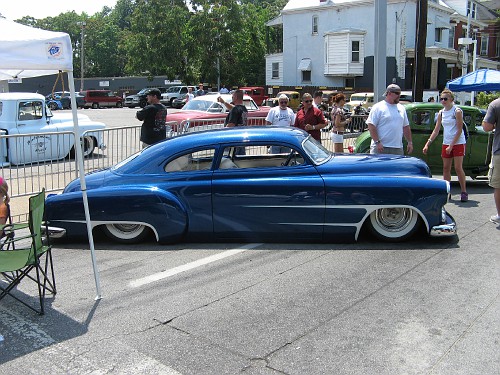
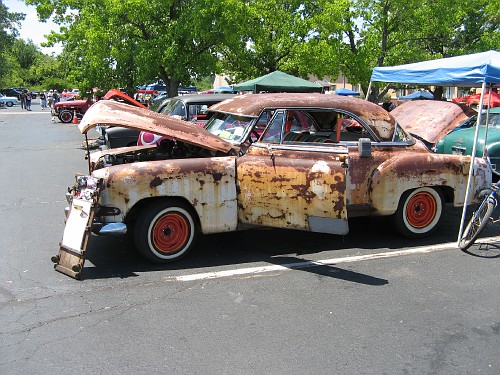
  This beautifully done 1952 Chevy won "Beater of the Year" for 2011. It has a lot of restyling cues that I will use on our '51.

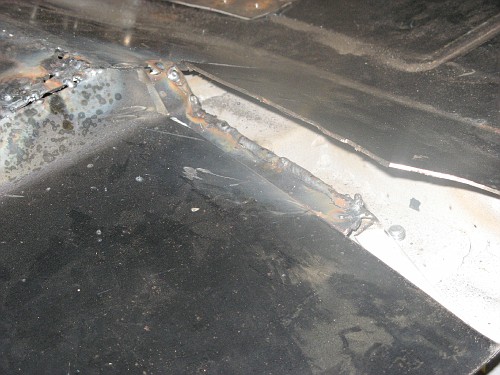
    Beatersville energized me for our build, as a good show always will. Soon, I had welded up all of the seams in the front footwell area solid (You saw them tacked in the last posting)

  At about this time, the steps to our deck started to come apart. I'd been planning a major overhaul to the deck since we bought the house, but now it was time to start. And of course, this ate into a lot of my garage time. I tried to split time effectively, but the deck has been taking precedence. I'm doing the deck in stages. The cost of lumber is so astronomical, I have no desire to lay out all the cash at once. I guess I do everything on a shoestring budget.

  Also, in mid June, I recieved my third major insult from my employer in the past 12 months. It was becoming clear that they did not have any appreciation of me (which I really couldn't care less about), and that things were going to continue to decline as long as I remained there (which I DID care about). So, I started searching for a replacement job, and within 48 hours, my phone was exploding with interested prospective employers. So now, on top of working full-time, being a husband and father, taking on  a semi-major home renovation and actively seeking new employment- car time was dwindling.

  The weekend after Father's Day is always the very best car show in Central Indiana- The Road Rocket Rumble. As always, it was entertaining, enlightening, and inspirational.


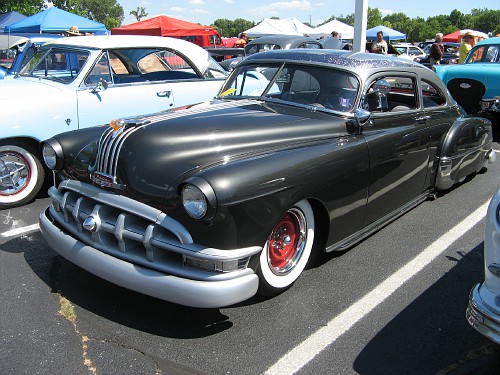
  Entertaining: This 1950 Pontiac was nearly perfect.


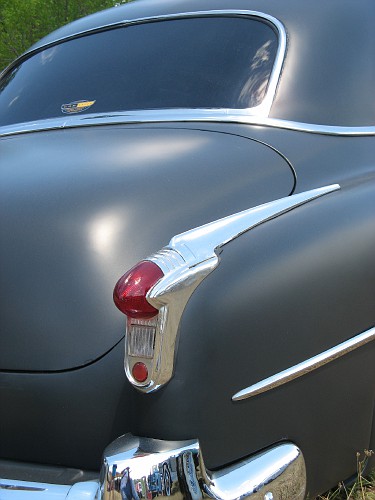
  Enlightening: I've been trying to find the perfect taillights for my car. How nice do these 1951 Oldsmobile taillights look? Not only do they look great, they are an easy fit to a '51 Chevy. In fact, the car you see this taillight on is a '51 Chevy.


  Inspirational: This scary looking 1952 Bel Air showed me something for my car. It has had complete footwell replacement, and when they were replaced, the upper cowl braces were left off with no ill effects. This got me thinking.

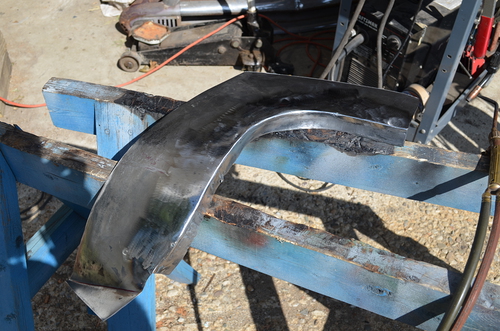
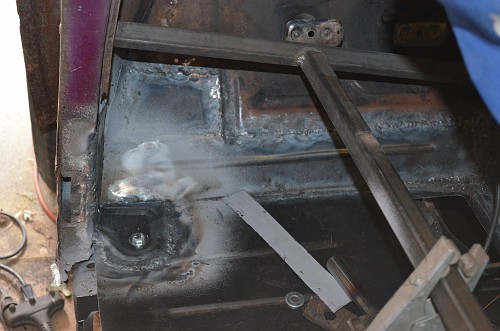
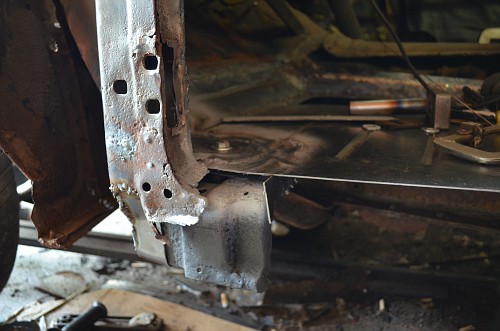
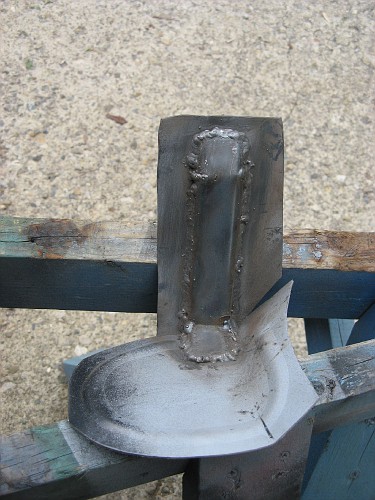
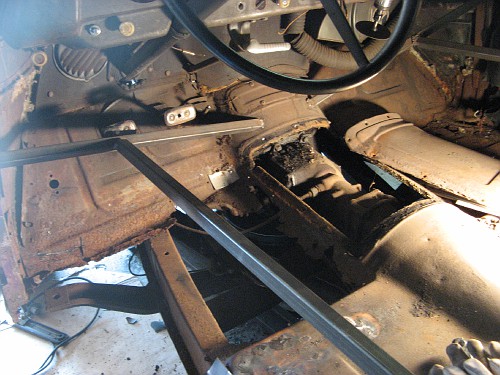
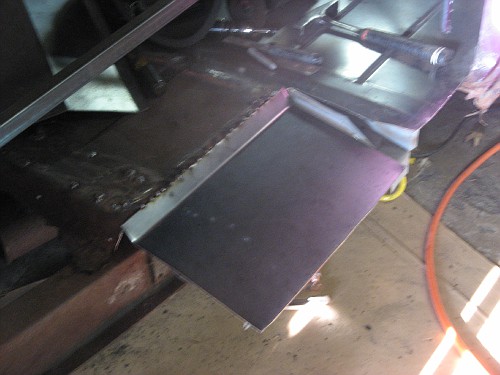
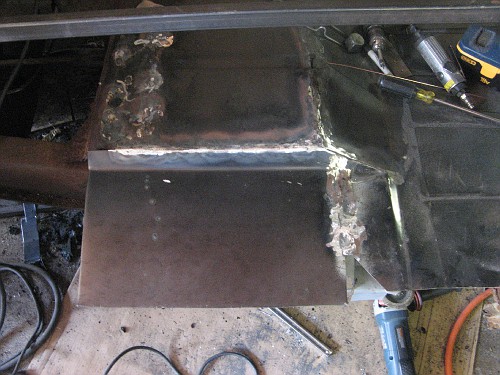
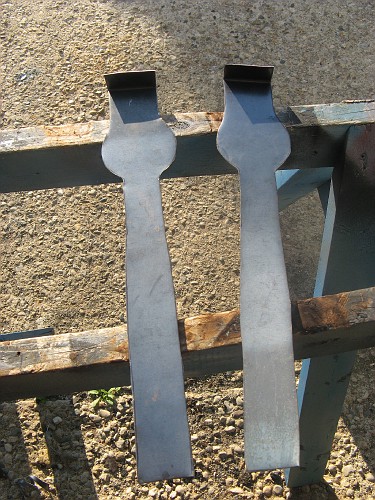
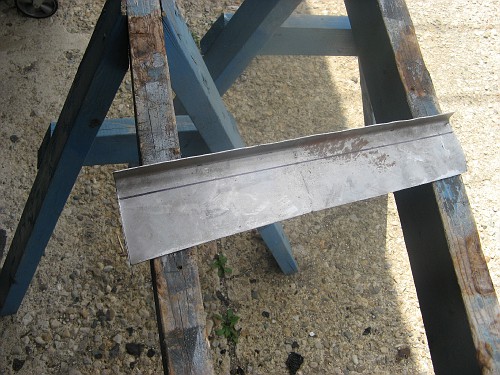
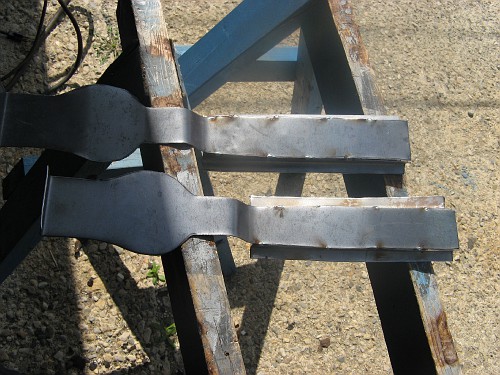
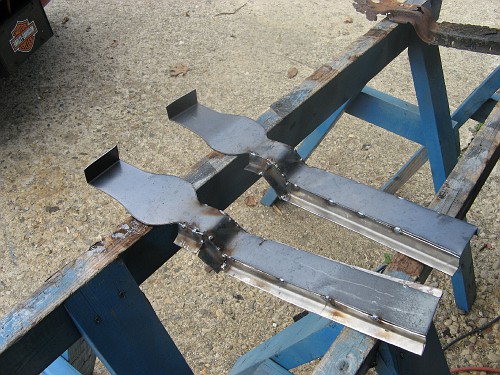
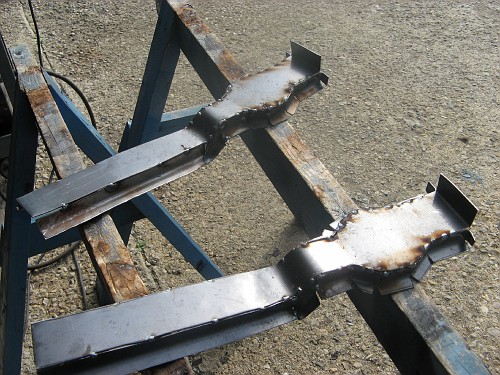
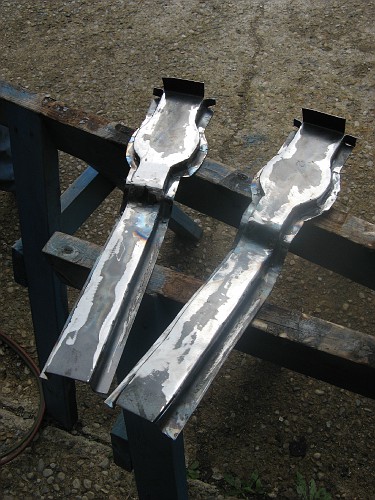
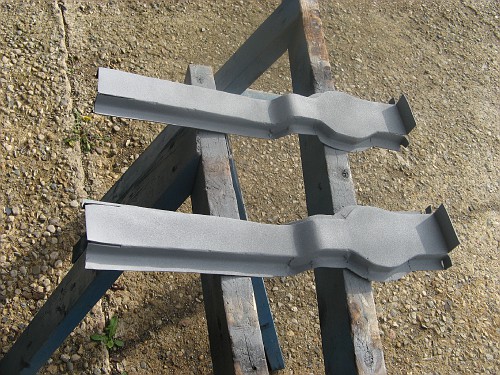
  Back to our car for a bit. That scary loking '52 Bel Air got me to thinking. It was doing fine (structurally) with no upper cowl braces at all. The ones I had made were close to original size, and were strong as could be. But how necessary are they? Based on what I'd seen, coupled with the fact that my work on the bottom of the car has been done with thicker metal than original, I decided that I could do fine with a scaled down version. Instead of the multiple piece units you saw me with in the last post, I made some smaller, simpler ones. Instead of the fabricated vertical channel, I went with just using the bead roller.


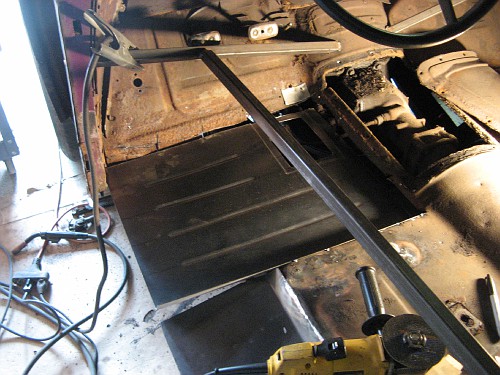
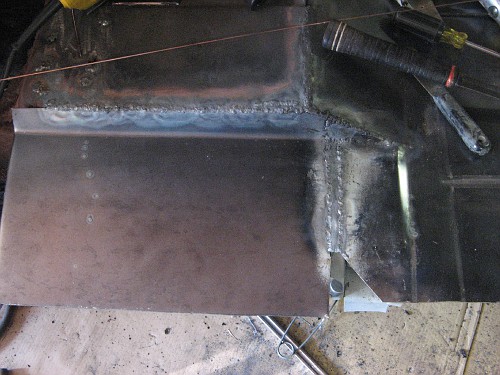
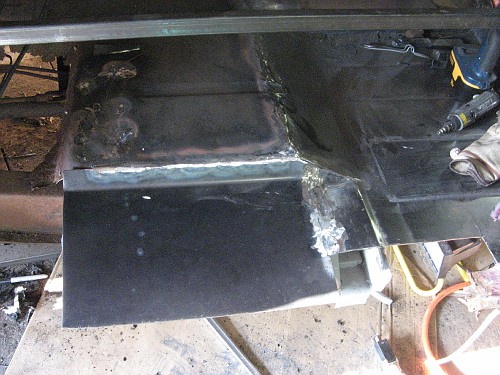
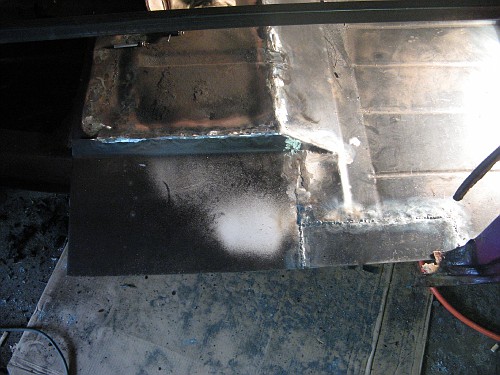
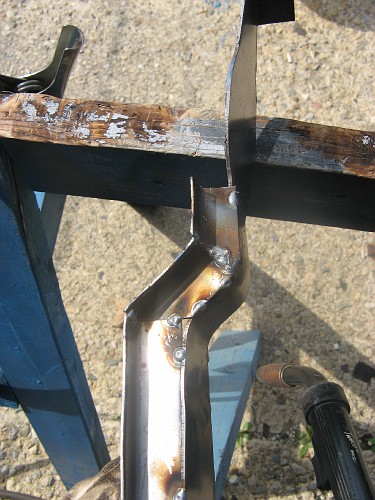
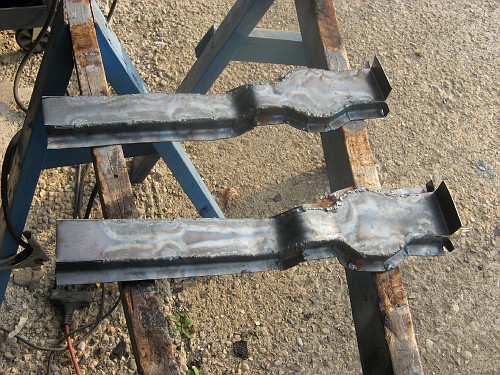
  And here is the driver's side all welded in. The lower profile brace will pay dividends later when it comes time to do the interior.

  By mid-July, the job search was over. I'd found a day shift position for a couple of sheckels more and also offering tuition reimbursement. All to the good! I gave my two week notice to Redcats the night before we left for our annual camping trip in celebration of 51Kid's birthday.

  On the way to the camping trip, we were forced through three separate detours for road construction. This wasn't all bad, as the last one forced us to drive through Logansport, instead of around it. 51Chick is from Logansport, so we'd driven past the repair shop that always has 40 or so old cars for sale or parts, but we'd never seen anything we could use there.

  Until that day


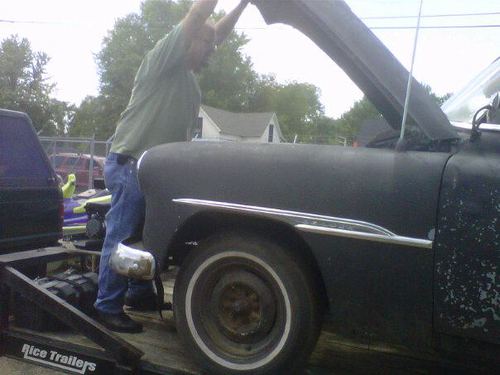
  He didn't even have it unloaded from the trailer yet. Do you see what I see? A PERFECT driver's side fender. The inner fender was just as perfect. I had no tools with me, and we did not have room for the fender in the family truckster with all of the camping gear. BUT- I had cash! And I needed this fender BAD.


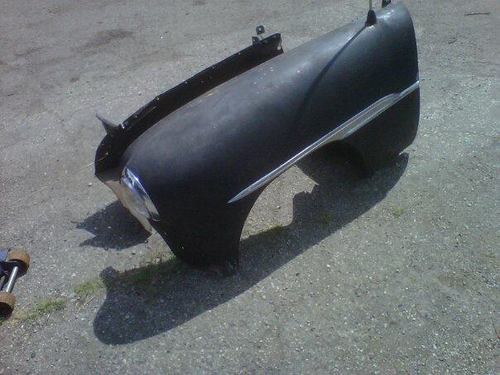
  Well, the lot owner was more than happy to loan me the tools I needed, and an hour later, I was peeling off $200.00 for this piece of wonderfulness. Fenders like this do not come along every day, and for the condition, the price was acutally very good. The 51Mother-in-Law lives only a few blocks away. She loves old cars in general, and her first car was a '51 Chevy. She agreed to let me store the fender at her place for a few days until I could come back for it. We tossed the fender on top of the camping gear, and we rode through town for a few blocks with the hatch open, and me in the back seat holding on to our prize, "Beverly Hillbillies" style.


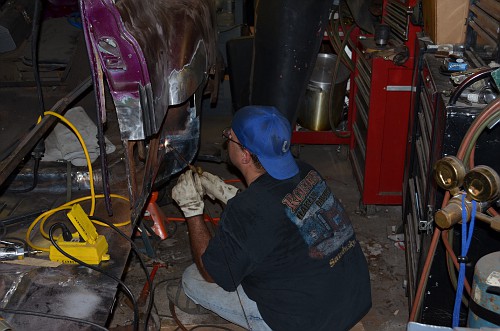
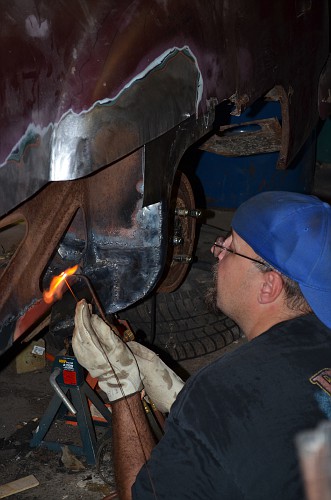
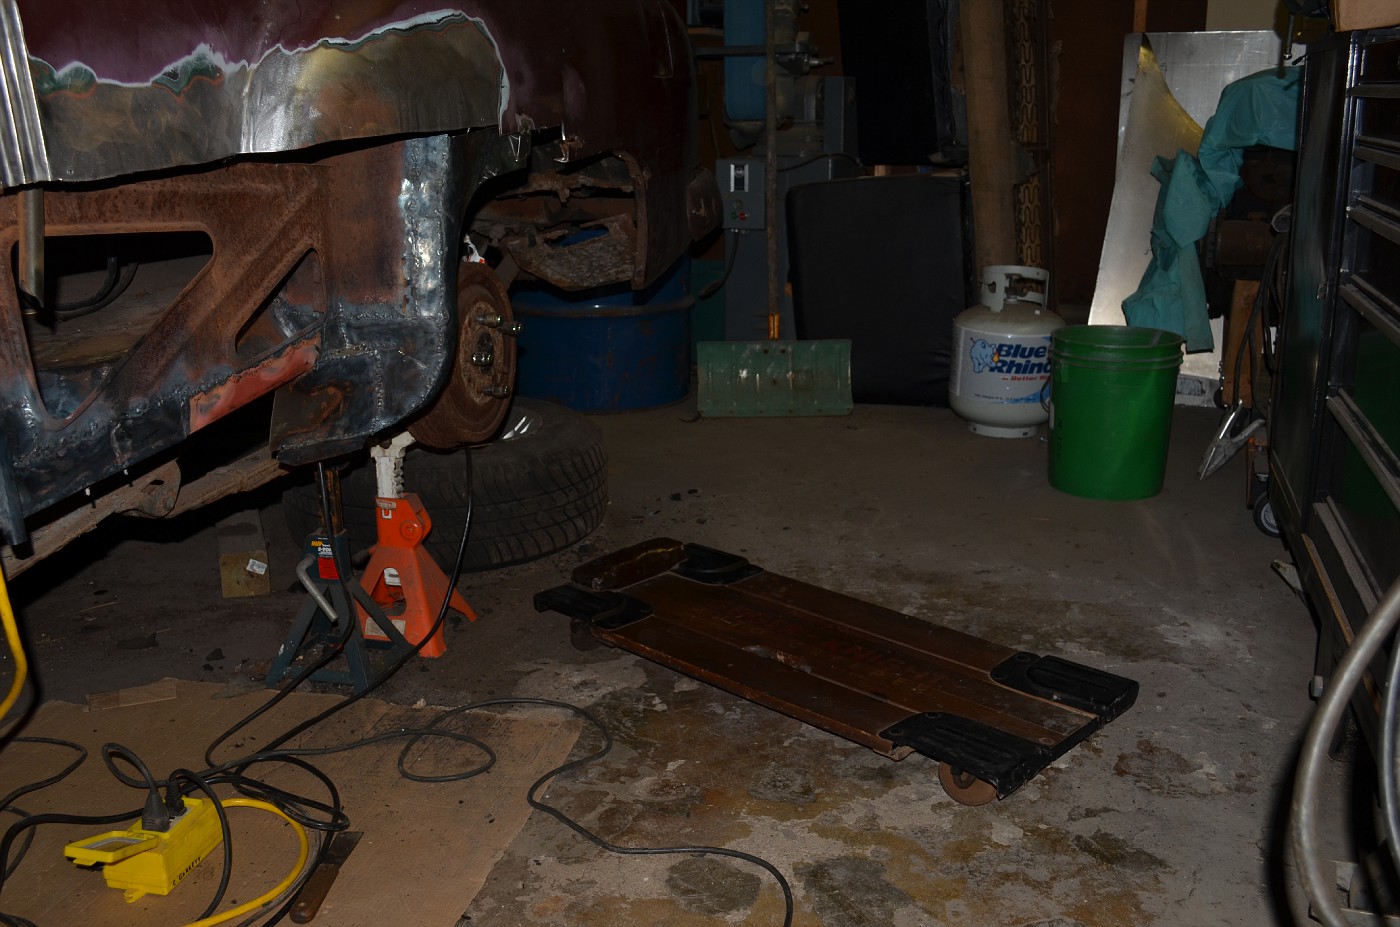
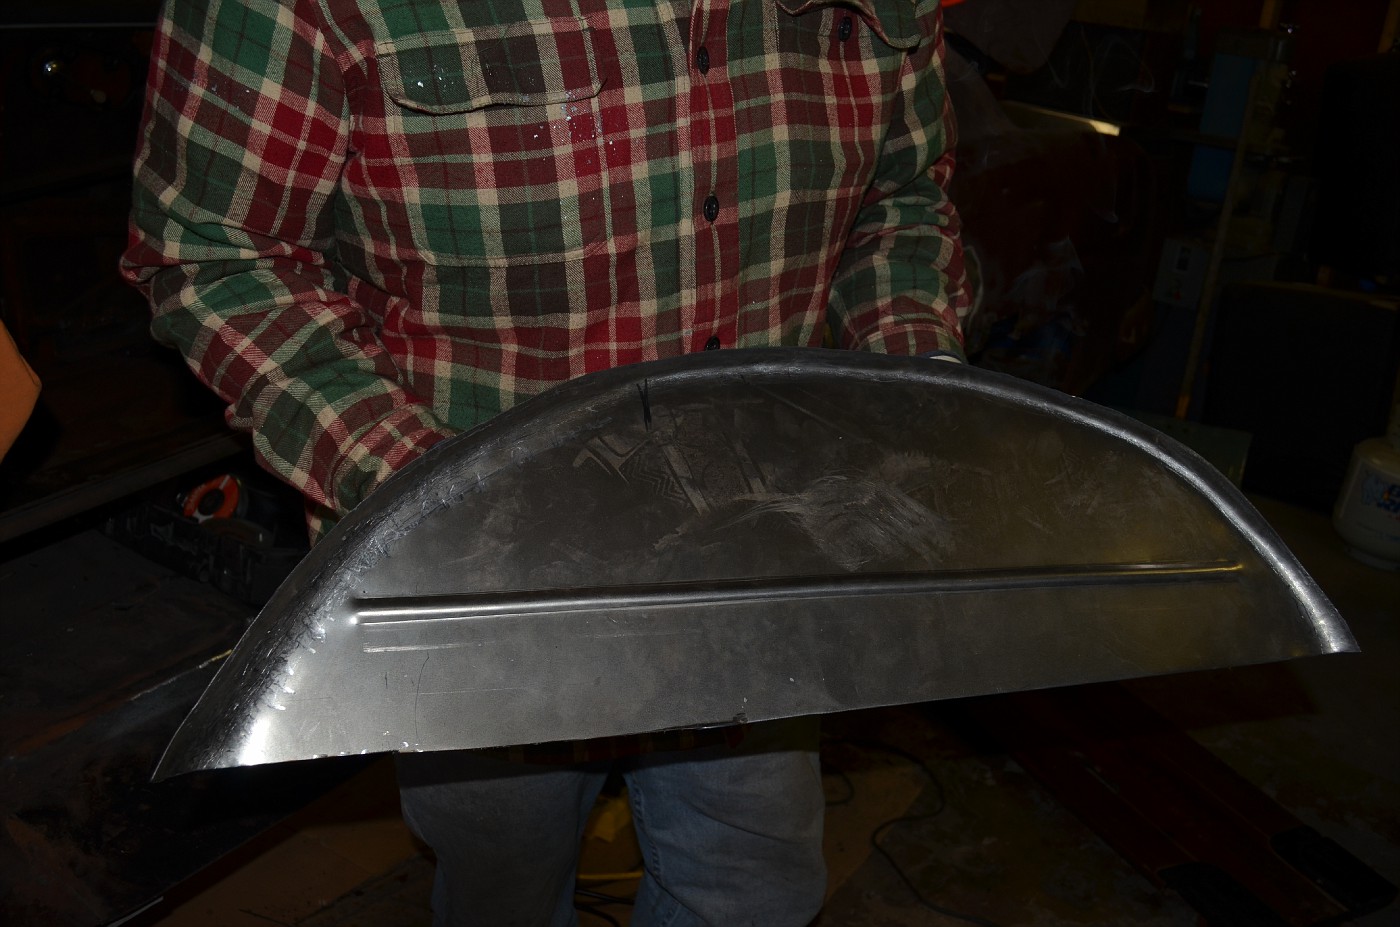
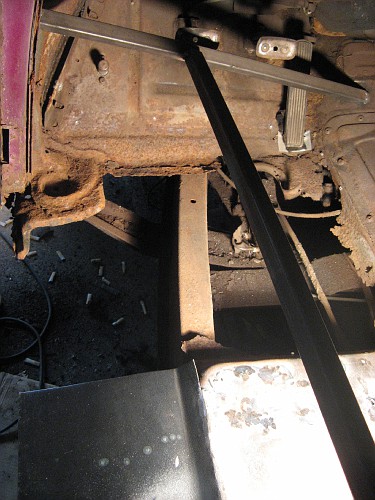
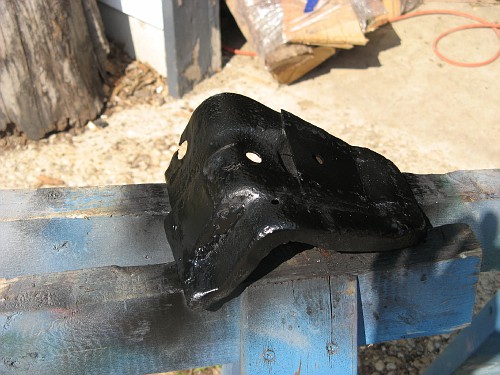
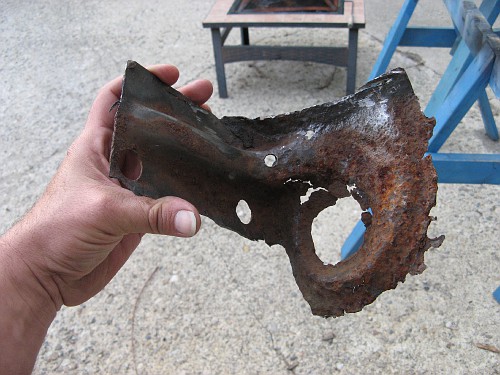
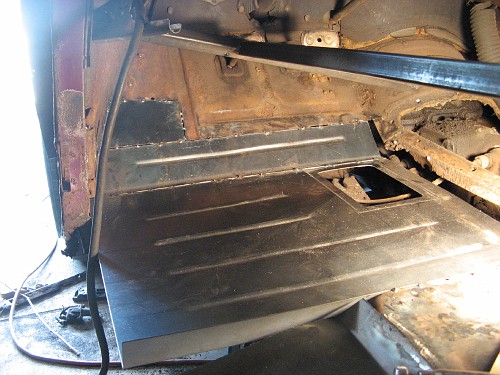
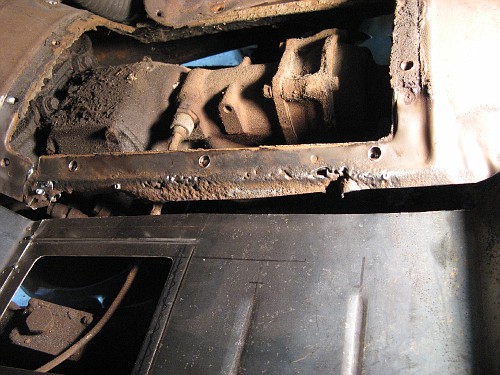
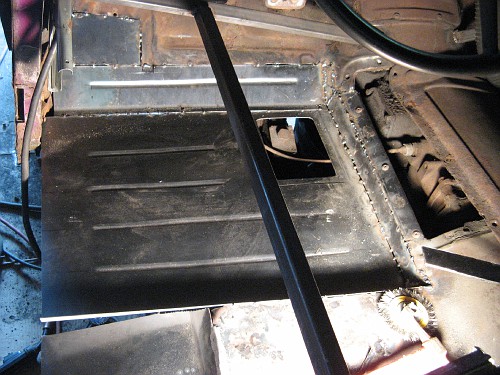
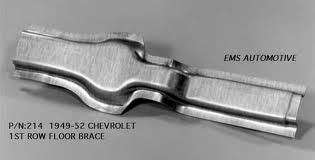
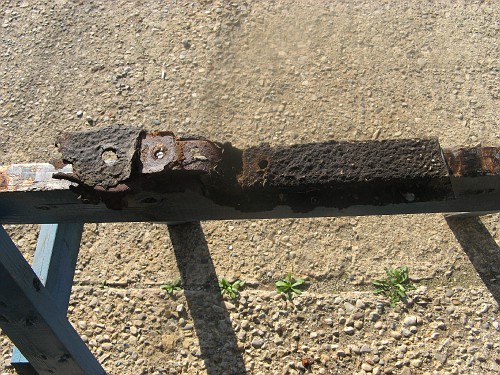
  Back to squeezing in a bit of time for the car, I installed the repaired lower cowl brace, and began some of the repair work on the cowl itself.

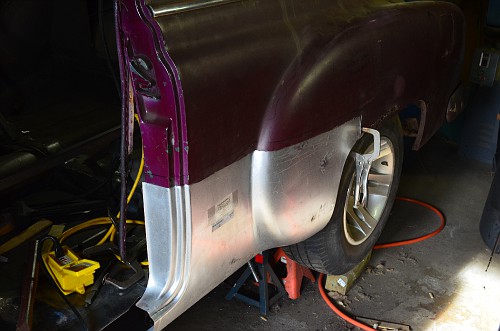
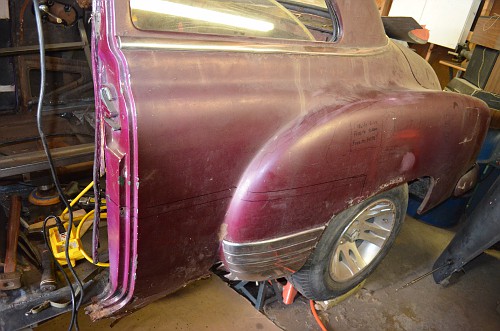
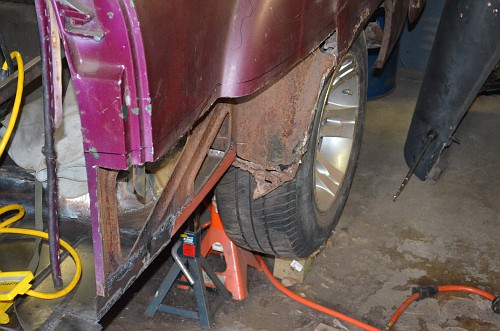
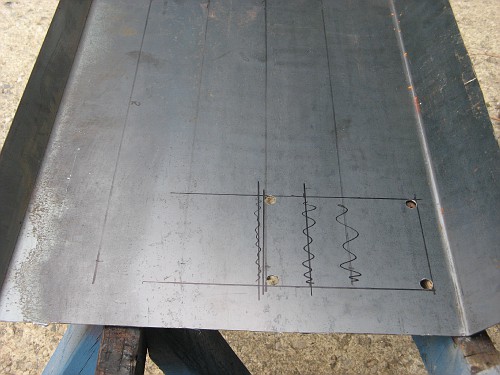
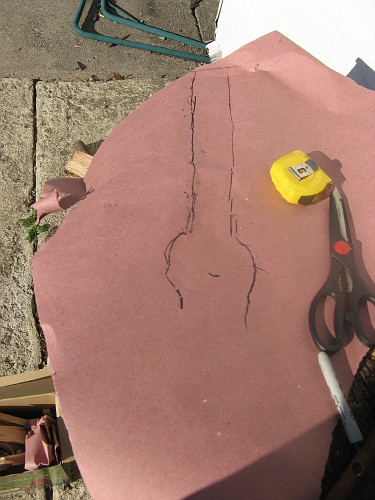
  At this point, I realized that I really need to get the inner rocker panel made and installed so that I can finalize all of these repairs. Since I'm making everything myself, I need to mock up the outer rocker in place to verify exactly where everything should be. And, in order to mock up the outer rocker, I first need to mock up the front of the quarter.


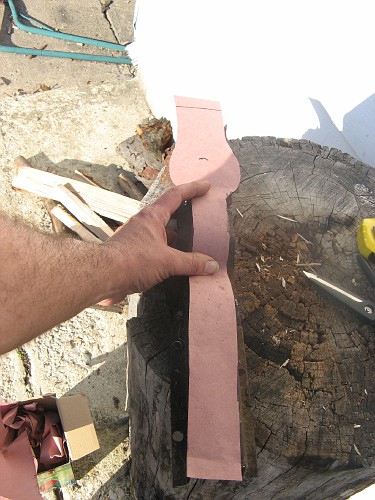
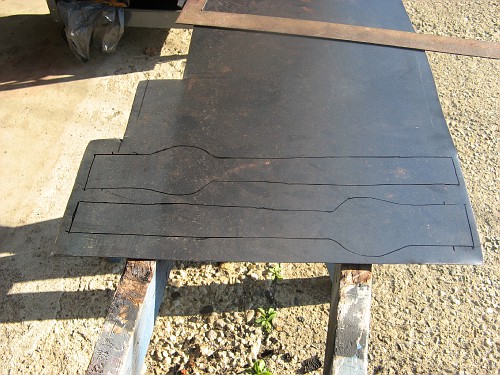
  So, I used the replacement quarter to mark off some lines, then got out the zip wheel!


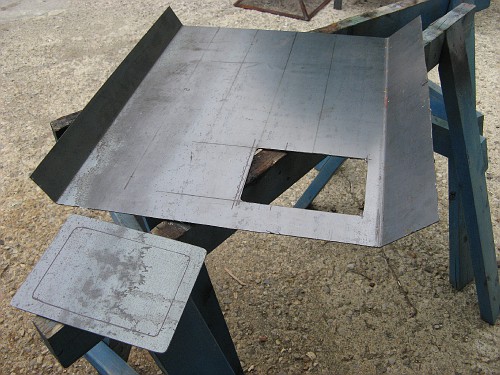
  Oh yeah- we're definitely getting into outer sheetmetal work, now!


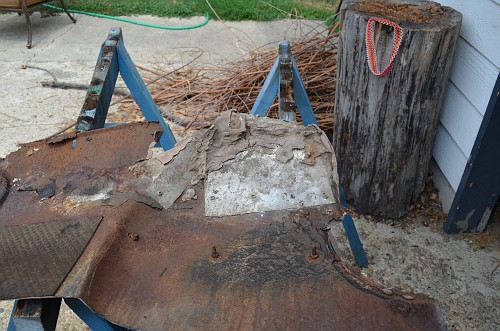
  Inside the old rear quarter. Nice roof flashing, pop rivets and "pottery work" with bondo. If your bodywork resembles this: you're doing it wrong.

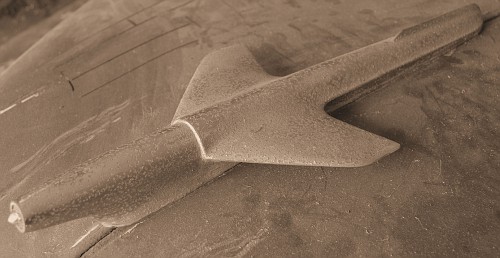
  So, the new job has started. It's going to take me a week or two to adjust to days after ten years of off-shift work, but I'm hoping that I can squeeze in more car time with the new schedule. We also upgraded from a nice point and shoot digital camera to a VERY nice DSLR, so the photo quality should get better, And, the new camera lends itself to artistic stuff, so If I can manage to acuire some skills, I should be able to produce a neat car picture or two.


Saturday, May 26, 2012

Sniffing

  It's been a busy month. When we last spoke, we were ready to begin rebuilding the front footwell on the driver's side.


  Step one is to remove the upper and lower cowl braces. The lower wasn't too bad, and I was able to repair it

The upper brace, on the other hand...

    We have two options with this upper brace. One option would be to spend about 70 bucks and buy a reproduction piece. Option two is to fabricate a new one myself.

  The decision took less than a second. The fabrication took about an hour. Like everything else on the bottom of the car, it isn't an exact replica of the factory piece, but it will give us the strength we need, in the place where it is needed. And, by making them, there's another $150.00 we can spend elsewhere on the car.

  For the footwell, I cut it to size, then bent up the rear to make a new front for the seat riser, and also bent a kick up at the front to replace the bad area of the toeboard. I then marked out a new access hole for the master cylinder. Since I plan to go to a dual reservior master cylinder, I made the access hole a lot larger than the original small hole.  


 Once the new access hole was cut, I realized that I couldn't get the footwell into the bead roller with the toeboard kickup in it, so I cut the toeboard kickup off, and will make it as a separate piece.

  Here, we've flanged the area around the access hole so the cover will sit flush, and also have rolled some strengthening ribs in the footwell area. Now, it's time to move to the car.

  I removed the transmission access cover, since the floorboard was rotten right up to the flange for the cover.

Started tacking it in at the seat riser.

  Hey!!! We had our big May swap meet last weekend!! Went both Friday and Saturday. Friday has a better selection, but Saturday (especially near the end of the swap) the prices get good!!!

  Here's the score of parts for the weekend! In this picture, we have a glove box door and clock housing for a '51 Chevy. Those two pieces and the interesting sill plates that I may or may not use cost me a whopping ten bucks. There's a pair of '39 Dodge taillights that I have no idea if I will ever use, but for 12 bucks, I wasn't leaving them there. The hood bird is a rechromed '51 Chevy piece. It's not perfect, but it's VERY close, and it was only ten bucks. At the top is my best score- the Offenhauser dual carb intake for the 235 that will go into the car. These retail for about $250.00. I picked this one up for $150.00. Remember the 150 I spoke of saving when I made my own upper cowl braces? Kinda makes this intake sort of free, doesn't it?

  Memorial Day weekend. Kind of a big car weekend here in Indianapolis, and it's not lost on me. Saturday was a busy garage day.

 Cut back the toeboard to good metal

  And tacked in a replacement section. Well, the area around the hole for the dimmer switch is a bit weak, too.

  So we'll cut a patch and tack it in there.

  Next on the hit list is the inner vertical section and the flange for the transmission access cover. You can see that it was rotted all the way up.

  First, the flange. Hard to see in the picture, but I rolled a slight ridge at the bottom of the flange to match the original.

  And finally, add the vertical section! At this point, we need to trim and finish the footwell at the rear a bit. After that, we weld up all of these tacked seams, do a few minor repairs on the cowl, and then we will move to the exterior rust repair on the driver's side. Exterior sheetmetal!!!! I'm actually starting to see the mountaintop!!! We're not there, yet (not by a long shot!) but I'm no longer trudging along, putting one foot in front of the other- I am starting to see the rest of the build unfolding before me!


Friday, April 27, 2012

Learning from mistakes

  Okay, back to the car. In the last update,  I showed how I made the front body braces. The next step was to weld the new one in on the driver's side, then replace the floor from the top of the seat riser to the side where the rocker will attach.


  Here's where we hit a snag. I extended the kickup of the rear footwell all the way across. As originally built, the kickup tapers down from the seat riser until it is flush with our new piece by the time it is out to the rocker area. My original floor was so rust damaged that there was no way to be exactly sure of the contours, so I made the decision to not extend the kickup.


  I started by modifying the front edge of the center body brace


  Then, I sliced the kickup, and flattened it down. I had to add a filler piece at the front, and a triangular filler piece at the side. Here, you see it all tacked up.


  All welded up


  And smoothed out.


  And finally, I cut out a rectangular section. We had the triangualar gap before, and this edge didn't transiton well with the floor behind the door post. By cutting out this whole area, I can add in a section that will solve both of these issues.

  "Both of these issues." Yes, I create a new issue for myself every so often. Three things cause this: One- The car was rusted so badly that it is impossible in some laces to see exactly what was originally there. Two- my insistence on making the new floor myself, rather than buying replacement panels. Three- the fact that this car will be a custom, and I am altering things here and there to suit my final vision. No time for snivelling, just figure out the soution and apply it!


  I had to alter the center body brace a bit more (of course), but was able to get the gap filled, with the transition I was looking for.

  For those of you who know these cars, you have probably noted that my variations away from stock on the seat riser area will cause issues when it comes time to bolt the front seat back in. You're right. However, I have planned all along to alter the front seat mounting. I plan to get the seat to sit an inch or two lower, to regain a bit of the headroom I'm going to lose when I chop the car.

  Next step: replace the front footwell.


  As you can see- there's not a lot (read: NOTHING) to go from. Whee! I'll start by replicating the cowl braces (center left in picture), then bend and bead up the new footwell. Once that is done, I'll actually move on to replacing some exterior sheetmetal on the driver's side. Then, repeat the whole process on the other side of the car. At that point, we'll finally be able to remove the body from the frame!

  For those of you who follow, I'll be taking you along for the ride.


Friday, March 23, 2012

When we was fab

  This post is going to be a bit different. There was recently a question posed on the ChevyTalk forum wondering if anyone had made their own body braces. The person posting is working on a 1950 Sport Coupe, and was trying to decide between making his own, or simply buying aftermarket pieces.

  I can't decide what is best for anyone, but I shared from my experiences of making the rear and center braces. The aftermarket parts are outstanding in quality, but they are pricey. At $75.00 each, with each car using six, you're looking at $500.00 by the time you add shipping, if your car needs all six (and you KNOW mine does) Well, the decision was easy for my shoestring budget.

  Last weekend, I made the two front body braces for my car. This post is going to go through how I did it, step by step. Maybe it's a tutorial, maybe it's just a "here's how I did it." It's not the only way to make them, and it may or may not be the best way to make them. What is undisputable, is that it's an effective way to make them.

  For those who want to see a lot of general progress on the car- go ahead and skip reading the rest of this post. The car isn't even in any of the pictures- just the parts I'm making for it. This post is just going to show the process of fabricating $150.00 worth of parts using about $15.00 worth of metal, electricity and welding supplies.

Here is a picture of the replacement part, as available from EMS Automotive. EMS parts aren't cheap, but the value for the dollar is excellent. I've bought some external sheetmetal for the car that was made by them and I've been VERY satisfied with the quality. Spendy, but absolutely worth it.

Here's the one I pulled from the drivers side of my car. Notice that there is over an inch missing from the left side. Mother Nature certainly thought my car was tasty.

I started by tracing out the top of what is left of my brace onto heavy paper. Then, from taking some measurements and looking at the picture of the replacement brace, came up with an estimate of what the missing section looked like

When I had drawn it out, I cut out the pattern. Here, I've rested it on the old brace to make sure it matches up.

I trace the pattern on to a piece of 16 ga. The braces are the same from right to left side, so I'm actually making two identical parts, not mirror images. It isn't on the replacement part, but I left enough metal to bend up a flange, in case I need it.

Cut out the pieces, and bent up the flange in my brake.

Here, I've added the slight kink just before it flares out into the large section. I've also bent the rounded offset, using the round handle on my tool cart. (Hey- use what works!)

I measured in 1/2" and put a 90 degree bend. I measured 3/4" from that and marked a line, then cut it with my unishear. The 3/4" is the height of the brace, and the 1/2" is the flange that we'll use to weld it to the floorboard. 

Here, I've tacked the 3/4" X 1/2" to the sides of the main section. Just a few tacks with the MIG for now. We'll get it all tacked up before we finish weld.

Using a die grinder, I've cut small sections and tacked them in to form the offset.

The offsets finished on both sides of both pieces

To get from the offset to the end of the brace, I used one piece. I tacked it at the end of the offset, then bent a little, tacked a little until I got to the end. As you can see, I had to cut slots to relieve the flange so it would bend around the curve.  Now that they're all roughed out, it's time to put away the MIG and get out the torch to finish weld them.

Here they are with the seams welded up. Notice that I left the last inch or so of the seam unwelded at both ends. This is to allow me a bit of room for fudging the fit when I install them. I'll finish up the last bit nonce they're installed.

Here, I've smoothed out the welds, roughing them with a grinder and finishing with a flap wheel. At this time, I hold them up to the light and examine all the seams, looking for any holes that need to be touched up with more welding.

Here they are with a coat of weld-through primer drying, ready to install.

  So, that's how I make them. I don't pretend to say that making them is preferrable to buying them for everyone. There are pros and cons to both methods. If you buy them, you get a high-quality piece that is almost indiscernible from the factory piece, and you don't invest a lot of time making them. You're also out the better part of two Benjamins after you pay shipping. If you make them, you get strong, solid pieces that will look good under a coat of undercoating, but would not pass for factory pieces to a trained eye. You invest less than a twenty for parts, but you do kick in some time.

  Tools used: Unishear, die grinder with cutoff wheel, 4.5" grinders (one with grinding wheel, one with flap wheel), bending brake, hammers, dollies, MIG welder and oxy-acetylene welding rig.

  In the end, which way is best for a particular builder depends on several factors: tools available, skill level, ambition, available time, and available cash. This has been the "shoestring" way of getting there.