Friday, April 27, 2012

Learning from mistakes

  Okay, back to the car. In the last update,  I showed how I made the front body braces. The next step was to weld the new one in on the driver's side, then replace the floor from the top of the seat riser to the side where the rocker will attach.


  Here's where we hit a snag. I extended the kickup of the rear footwell all the way across. As originally built, the kickup tapers down from the seat riser until it is flush with our new piece by the time it is out to the rocker area. My original floor was so rust damaged that there was no way to be exactly sure of the contours, so I made the decision to not extend the kickup.


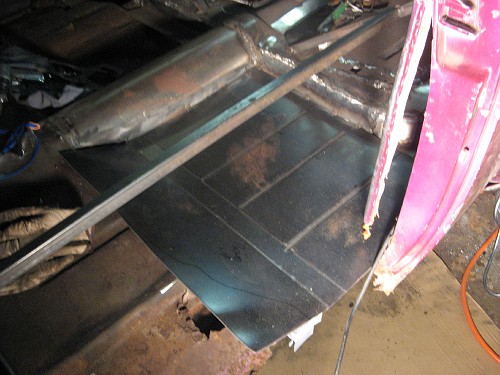
  I started by modifying the front edge of the center body brace


  Then, I sliced the kickup, and flattened it down. I had to add a filler piece at the front, and a triangular filler piece at the side. Here, you see it all tacked up.


  All welded up


  And smoothed out.


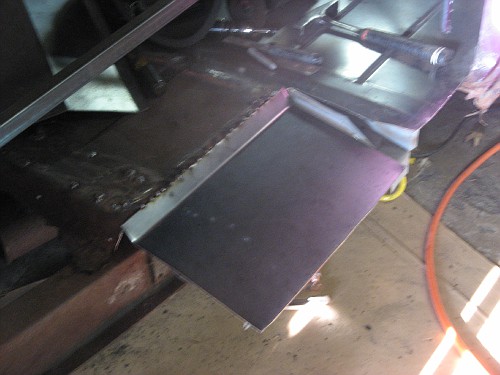
  And finally, I cut out a rectangular section. We had the triangualar gap before, and this edge didn't transiton well with the floor behind the door post. By cutting out this whole area, I can add in a section that will solve both of these issues.

  "Both of these issues." Yes, I create a new issue for myself every so often. Three things cause this: One- The car was rusted so badly that it is impossible in some laces to see exactly what was originally there. Two- my insistence on making the new floor myself, rather than buying replacement panels. Three- the fact that this car will be a custom, and I am altering things here and there to suit my final vision. No time for snivelling, just figure out the soution and apply it!


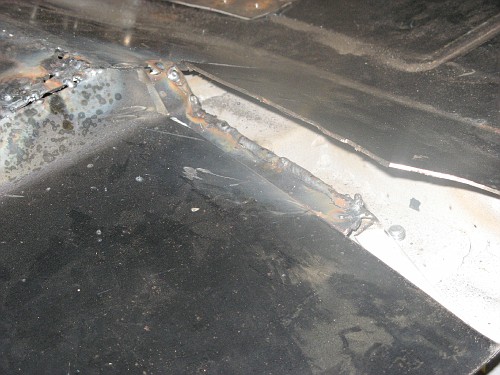
  I had to alter the center body brace a bit more (of course), but was able to get the gap filled, with the transition I was looking for.

  For those of you who know these cars, you have probably noted that my variations away from stock on the seat riser area will cause issues when it comes time to bolt the front seat back in. You're right. However, I have planned all along to alter the front seat mounting. I plan to get the seat to sit an inch or two lower, to regain a bit of the headroom I'm going to lose when I chop the car.

  Next step: replace the front footwell.


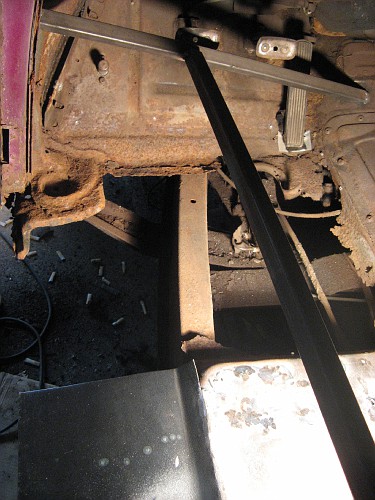
  As you can see- there's not a lot (read: NOTHING) to go from. Whee! I'll start by replicating the cowl braces (center left in picture), then bend and bead up the new footwell. Once that is done, I'll actually move on to replacing some exterior sheetmetal on the driver's side. Then, repeat the whole process on the other side of the car. At that point, we'll finally be able to remove the body from the frame!

  For those of you who follow, I'll be taking you along for the ride.


Friday, March 23, 2012

When we was fab

  This post is going to be a bit different. There was recently a question posed on the ChevyTalk forum wondering if anyone had made their own body braces. The person posting is working on a 1950 Sport Coupe, and was trying to decide between making his own, or simply buying aftermarket pieces.

  I can't decide what is best for anyone, but I shared from my experiences of making the rear and center braces. The aftermarket parts are outstanding in quality, but they are pricey. At $75.00 each, with each car using six, you're looking at $500.00 by the time you add shipping, if your car needs all six (and you KNOW mine does) Well, the decision was easy for my shoestring budget.

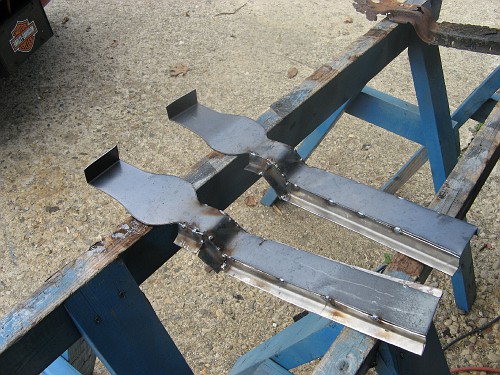
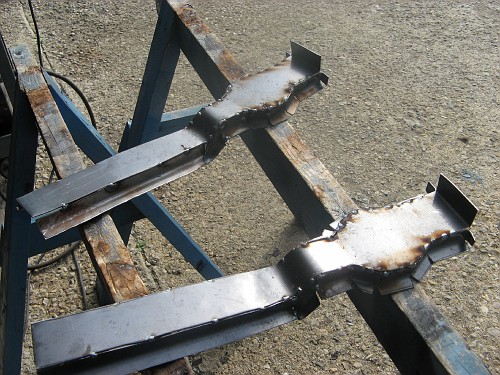
  Last weekend, I made the two front body braces for my car. This post is going to go through how I did it, step by step. Maybe it's a tutorial, maybe it's just a "here's how I did it." It's not the only way to make them, and it may or may not be the best way to make them. What is undisputable, is that it's an effective way to make them.

  For those who want to see a lot of general progress on the car- go ahead and skip reading the rest of this post. The car isn't even in any of the pictures- just the parts I'm making for it. This post is just going to show the process of fabricating $150.00 worth of parts using about $15.00 worth of metal, electricity and welding supplies.

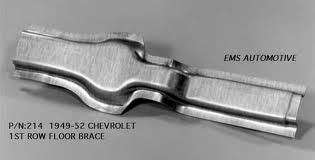
Here is a picture of the replacement part, as available from EMS Automotive. EMS parts aren't cheap, but the value for the dollar is excellent. I've bought some external sheetmetal for the car that was made by them and I've been VERY satisfied with the quality. Spendy, but absolutely worth it.

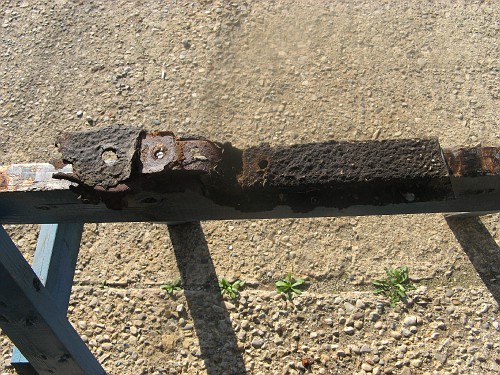
Here's the one I pulled from the drivers side of my car. Notice that there is over an inch missing from the left side. Mother Nature certainly thought my car was tasty.

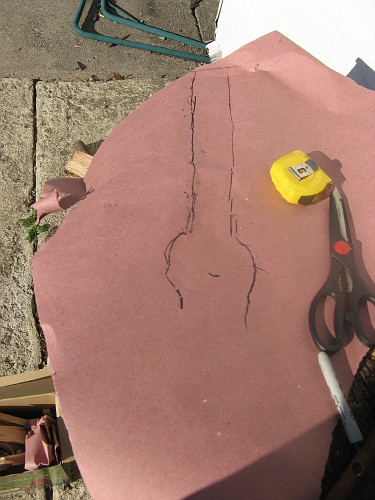
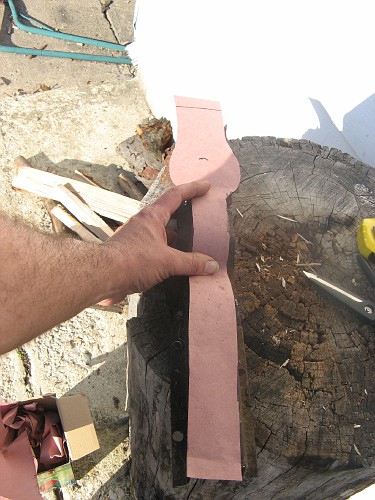
I started by tracing out the top of what is left of my brace onto heavy paper. Then, from taking some measurements and looking at the picture of the replacement brace, came up with an estimate of what the missing section looked like

When I had drawn it out, I cut out the pattern. Here, I've rested it on the old brace to make sure it matches up.

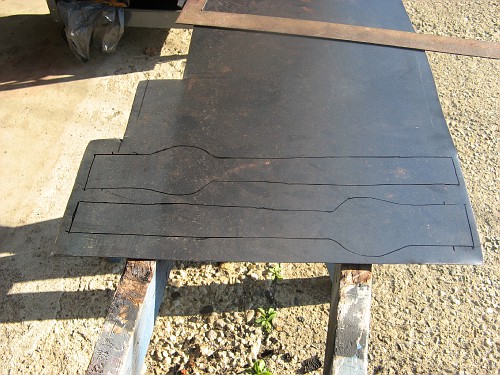
I trace the pattern on to a piece of 16 ga. The braces are the same from right to left side, so I'm actually making two identical parts, not mirror images. It isn't on the replacement part, but I left enough metal to bend up a flange, in case I need it.

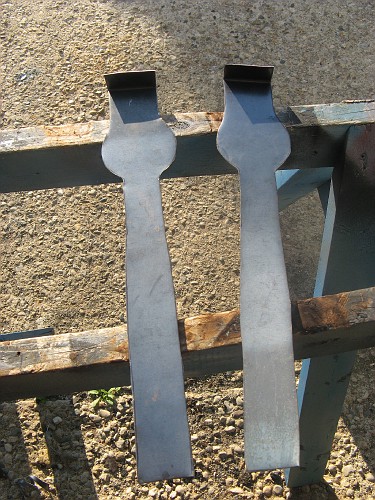
Cut out the pieces, and bent up the flange in my brake.

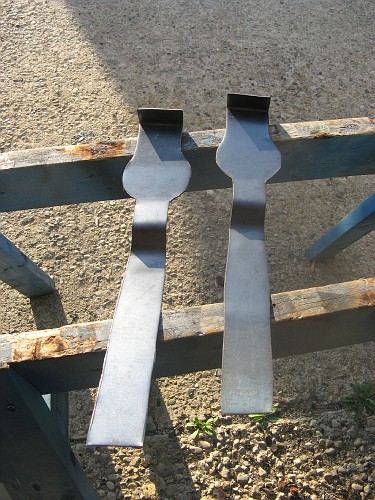
Here, I've added the slight kink just before it flares out into the large section. I've also bent the rounded offset, using the round handle on my tool cart. (Hey- use what works!)

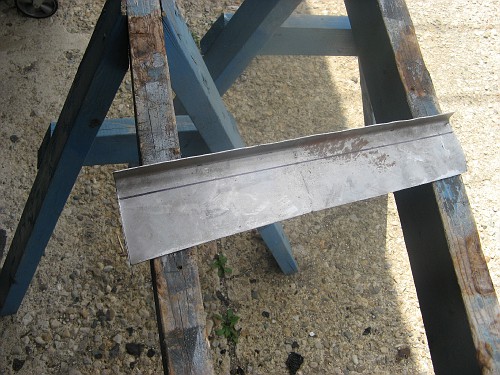
I measured in 1/2" and put a 90 degree bend. I measured 3/4" from that and marked a line, then cut it with my unishear. The 3/4" is the height of the brace, and the 1/2" is the flange that we'll use to weld it to the floorboard. 

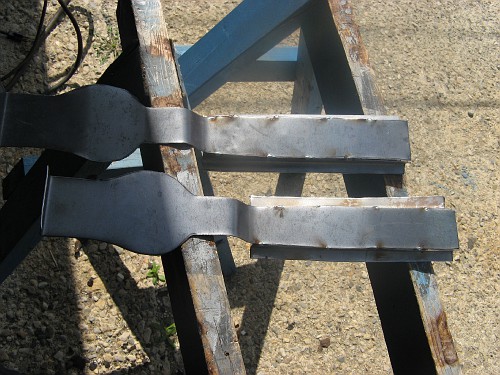
Here, I've tacked the 3/4" X 1/2" to the sides of the main section. Just a few tacks with the MIG for now. We'll get it all tacked up before we finish weld.

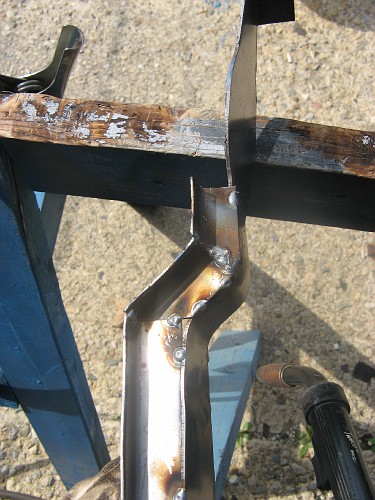
Using a die grinder, I've cut small sections and tacked them in to form the offset.

The offsets finished on both sides of both pieces

To get from the offset to the end of the brace, I used one piece. I tacked it at the end of the offset, then bent a little, tacked a little until I got to the end. As you can see, I had to cut slots to relieve the flange so it would bend around the curve.  Now that they're all roughed out, it's time to put away the MIG and get out the torch to finish weld them.

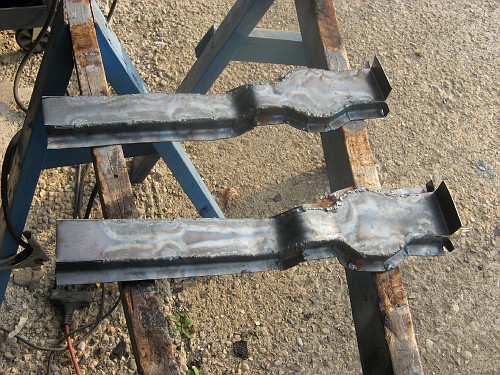
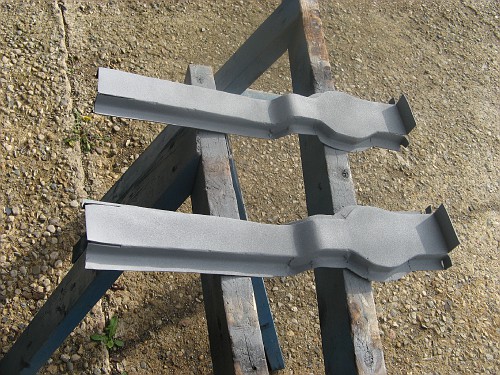
Here they are with the seams welded up. Notice that I left the last inch or so of the seam unwelded at both ends. This is to allow me a bit of room for fudging the fit when I install them. I'll finish up the last bit nonce they're installed.

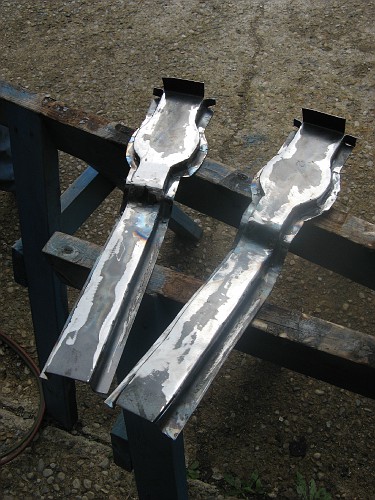
Here, I've smoothed out the welds, roughing them with a grinder and finishing with a flap wheel. At this time, I hold them up to the light and examine all the seams, looking for any holes that need to be touched up with more welding.

Here they are with a coat of weld-through primer drying, ready to install.

  So, that's how I make them. I don't pretend to say that making them is preferrable to buying them for everyone. There are pros and cons to both methods. If you buy them, you get a high-quality piece that is almost indiscernible from the factory piece, and you don't invest a lot of time making them. You're also out the better part of two Benjamins after you pay shipping. If you make them, you get strong, solid pieces that will look good under a coat of undercoating, but would not pass for factory pieces to a trained eye. You invest less than a twenty for parts, but you do kick in some time.

  Tools used: Unishear, die grinder with cutoff wheel, 4.5" grinders (one with grinding wheel, one with flap wheel), bending brake, hammers, dollies, MIG welder and oxy-acetylene welding rig.

  In the end, which way is best for a particular builder depends on several factors: tools available, skill level, ambition, available time, and available cash. This has been the "shoestring" way of getting there.


Wednesday, February 29, 2012

Spring Cleaning

  Kind of funny how the last paragraph of the last post mentioned that I slow down during cold weather, and that was 3 months ago!

  Holidays, cold weather, some health problems in the family- they all slowed me down considerably over the Winter. But, there were things accomplished, so lets cover that.

  Thanksgiving. An odd series of events left us celebrating Thanksgiving at home by ourselves. 51Chick and 51Kid were in the house, cooking and cleaning the living room in anticipation of putting up the Christmas tree. Well, there would be fussing, weeping, wailing and gnashing of teeth inside, so I hid out in the garage. Justin came over for a while, and we BS'ed and worked on the car.

Replaced the bottom of the rear inside panel on the drivers side

Then tacked in the new rear footwell.

  Putting in such a large piece of metal (the largest to date) was a big shot in the arm. The next weekend, 51Kid wanted to hang out in the garage with me. She wanted to practice some welding, which I readily agreed to. She started looking for some scraps, when I pointed her to where she'd be doing her practice for the day.

Of course, she was nervous about actually welding on the car. I had to remind her that even if she made a mistake, we could easily fix it. Once she'd dropped a couple of tacks on, she was INCREDIBLY full of herself for actually helping put the car back together.

   She even set in on fire during her welding. I congratulated her on this milestone, because "It ain't yours until you've set it on fire."

 
Sometimes difficult to do during cold months, but we hit it where we can.

  Shop time got real sporadic during December and January. A lot of the available time was spent welding up the floorpan, and planning the next steps to take. I quickly noticed that the floorpan wasn't set quite right at the front, so I ended up cutting it back apart, seating it better and rewelding it.

  Hard to see where it has moved, but it sits MUCH nicer now.

  Since then, there has been a lot of finish welding seams that were previously only tacked, planning the next steps, and even some Spring cleaning on the shop. I'm looking to have a very productive year in the shop. My goal is to complete all rust repair on the main body shell by next Winter.

  I'm also strongly thinking of supplementing this blog with a vlog. I'll keep you posted on when or if that happens.


Friday, November 18, 2011

Why do I blog about this?

  There are several reasons, actually. One is certainly so that my friends and family can follow along with the progress. I am also doing it selfishly, to serve as a build journal for myself. Since I am a member of a few message boards that deal with old cars like this one, I do the blog so that as I make progress, I write a new entry for the blog, and then just put up a link on the message boards instead of writing it out three times.

  And the other reason. There are many people with the skills (or potential skills) to take on a project along these lines. But, they lack a huge budget, or a big, well-equipped shop to do it in, and soon find themselves overwhelmed at the prospect, and never do it. I know that feeling very well, as it held me back for a long time. The blog is to show people that it CAN be done on limited resources.

  Anyhow, when I last left you, I had just begun to make the center body brace for the driver's side. A bit more cutting, bending and fitting, and I had the shell of the brace tacked together


  There are two bolts that screw into this brace from underneath that fasten the body to the frame. I drilled out the holes, and made these two blocks


  Screwed bolts into them through the holes to ensure that everything will line up, and then tacked them to the brace


  Once tacked, I removed it from the car, and, it was ready to finish off.


Finish welded


ground smooth


  And a coat of weld through primer.

  It's almost ready to install, but before I do, I'll use it as a pattern to go ahead and make one for the passenger side, so I'll have it ready when I get to it.

  I originally planned to make my rockers from scratch, but I decided to spend a little of the money that I got for the Fairlane, and order up some new ones. After I install them, I'll modify them to Improve the car's styling.


  The bag with them is a complete set of body mounting rubber.

  During the time since my last entry, We passed the 100th anniversary of the founding of the Chevrolet Motor Car company. While out picking up some primer for the Chevy, 51Kid and I made a slight detour to pay some respects


  Co-founder of the company. He had left the company within 5 years of its' founding, but it still retains his name.

  It's getting colder. I'll freely admit that cold weather adversely affects my motivation to go out to the shop, but I want to keep pushing forward, as I really want to get to the next milestone in the build by the end of next Summer, if not before.


Wednesday, October 19, 2011

Back to the grind. And cut. And weld

  Wow, was September a busy month for us! September is the car amd model contest marathon. First, we had Goodguys weekend, which also coincided with the Marion County swap meet. We snuck to the swap meet on Thursday, since I'm director of the model and pedal car contest at Goodguys, and am locked into the whole weekend there. Unfortunately, we didn't find anything for the car at the swap.

  Goodguys was great. It's now being held at Indianapolis Motor Speedway instead of Indanapolis Raceway Park. I miss the nostalgia drags that we had at IRP, but everything else about the new venue is better.

 After awards on Sunday, we got out a bit, and we met up with someone I was dearly hoping to see. Denise Sheldon is someone I know from the HAMB. She's a great person, and I really wanted Leigha to meet her because Denise is a true lady rodder. She does as much work as she can on her car, and she drives it. In fact, she came all the way from the Detroit area, and she drove her '47 Oldsmobile convertible all the way. No trailer queen, here.

  Leigha and Denise hit it off immediately, and Denise actually took Leigha for a ride in "Big Olds." Before the ride, Leigha had been on television, and had met Indy Car driver Ed Carpenter. A lot of really cool things happened to her that morning, but the ride in Big Olds was what she went on and on about all day.

  The next weekend was the double car show weekend. The Ducktail Run in Gas City and the James Dean Run in Fairmount. They're about a half hour apart, and both are excellent. We had to dodge a bit oif rain, but we still saw a ton of great traditional rods and customs


  A sea of cool iron at the Ducktail


  Then on to the the "Million Merc March" at the Dean.

  As if that weren't enough, the following weekend was the South Central Indiana Modelers Assn model contest. As a proud member of SCIMA, I handle the contest side of the show. It's always a great time, but it was starting to feel like I wouldn't ever get back to working on my Chevy!

  But that changed as we got into October!

  The second weekend of October, I made a huge step for the Chevy. I sold my 1968 Fairlane project that I'd owned for nearly 20 years.


  In addition to adding some funds to the kitty, this also frees up some room in the driveway. That driveway room will play HUGE for the Chevy in the semi-near future.

  But, believe it or not- I actually got back to the CAR!

    When we left off, we'd tacked in the rear body braces,m which was unpleasant and a bit gruelling. If I have not said it before, I'm not fond of welding overhead, and I absolutely DESPISE doing it in a tight spot. It's just never going to be enjoyable for someone who dislikes the scent of my own flesh burning as much as I do.

  But, I did add a few more tacks, and they're in securely enough for the time being. I promise we WILL finish weld them later. I also filled all of the holes left from cutting out the old ones without the benefit of the spot weld cutter, and ground the welds down a bit on the inside of the car. Next, we move forward, and that starts with removing the drivers side rear footwell.


  The most forward section of the footwell, where it meets the front seat riser. Remember when I promised to demonstrate how slick the spot weld cutter operates?


  With a small drill, you drill a hole for the pilot of the cutter


  Then, you cut through the top layer with the spot weld cutter. A little prying pressure between the pieces lets you know when you've successfully cut the weld. You can see with the weld on the left that the two pieces have separated.


  With the top piece removed, you can see that instead of leaving 3/8" holes in the lower piece, you only leave the small holes from the pilot drill. In this particular case, it won't matter as much, since we'll be replacing most of the brace, too. But, it does show how the cutter reduces work.

  Before I cut out the brace, I have to think a bit ahead. While I highly doubt that the brace is carrying a lot of weight, I have to be careful. If I cut something that's supporting a lot of weight, the entire body could sag, which would mean a TON of work to correct.


  This brace is tack welded to the frame at the bottom, and to the roof at the top. This should keep things from sagging.

  And when I removed the bolts through the brace, and cut the end of the brace off, the slot didn't close up at all while I was cutting. That tells us that nothing moved on us.


  The old brace sitting next to where it came from. Thge outboard end of this brace is totally gone, as is the one on the other side. Again, if I were trying to make it look exactly as it did originally, I'm pretty screwed, here. But, since I don't care about original appearance, I'm only concerned with work that is strong and cleanly done.

  I learned from the mistake with the rear braces. I'm doing this center brace with access to it from top and bottom, and will build the brace before the new footwell goes in.

  Since this brace is more complex that the rear braces, I'm going to actually build it in place. It has compound angles, and the easiest route is going to be to build it in three pieces, and build it where it's going to live.


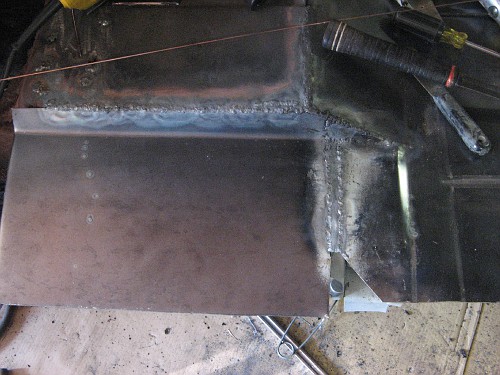
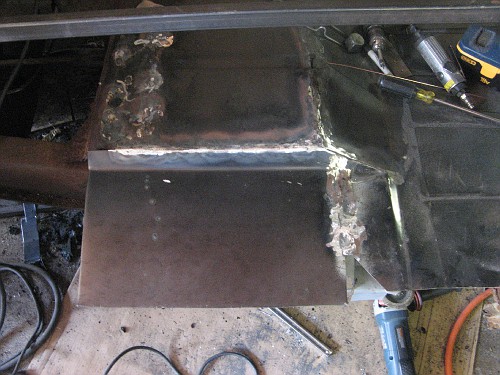
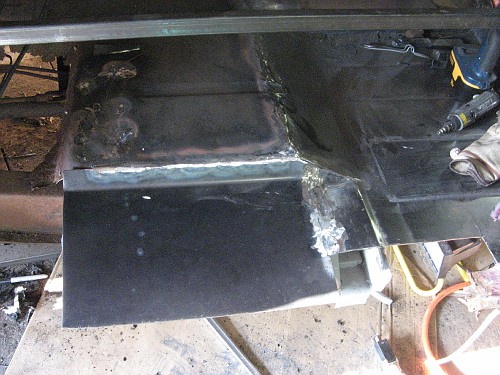
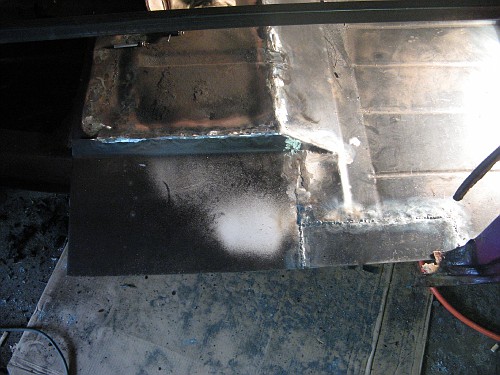
  Here, I'm starting to form the bottom of the trough. I need to be able to remove it at various points of the construction, so it's only attached with Tek screws and clamps for now. If you look closely, you can see where I've made two small marks just past the frame. The brace dips but about 1.5" here, and the marks show where to bend it to make the dip. 

  While I'm building this, I have to make a few decisions about the exact order to attack things, but at this point, I'm pretty sure that I will be finishing the driver's side all the way to the firewall before returning to the passengers side.




Sunday, September 11, 2011

Over the hump

  I hope. Clearly, looking back- I should have done the rear body braces before I replaced the sheetmetal in the rear seat riser. That certainly made the rear body braces a LOT more difficult.

  In our last installment, we fabricated new braces. Now was the time to install them. As much as cutting, grinding and welding are a huge thrill, when you're lying on your back, in a confined space, and working over your head- a lot of the fun drains right out of it. But hell, if this stuff was easy, anyone could do it.

  When you're welding upside down, you get an extra safety concern- your welding puddle, which normally lays right there in the work area, can sometimes be overcome by gravity. When it does, you don't want ANY part of your body directly beneath the weld zone. If you're wondering if I learned this the hard way, yes I did. The worst burn I've ever had in my life was incurred while repairing body braces on that blue and white '59 Chevy you saw the picture of in an earlier post.

  So, I put on a  cap to keep debris out of my hair, and got the biggest eye protection I had, and ground the surface for the passenger's side brace clean. Of course, I had to cut off the end of the new brace to get it into place, but welding it back together won't be a problem. I did a little trimming, and then tacked the brace into place.

  The darker gray rectangle running from top center down and slightly to the right is the new brace. It's disappearing under the tabs on the frame where body mounting bolts go through.

  For the driver's side, I had my new spot weld cutter to use, and now that I've used one, I can't believe I haven't had one before now. It's hard to take pictures under the car, but when I get to some work out on more accessible areas, I'll show you just how well it really does work.

  It took less time to get to the same point with the driver's side.

  With both braces tacked into place, We can now move forward. I need to do some more repairs to the top of the seat riser, since I did some damage removing the braces. Once that is done, I'll finish weld the braces, and then we'll be on to replacing center body braces and rear footwells. And we'll do both at the same time, which should go a lot faster than the rear braces.

  And, I have a new side project. When I got this car, I really hoped it would be a family project. I've encouraged the girls to get involved as much as they want. 51Chick seems to be happier doing parts searching, and 51Kid seems to enjoy getting hands-on (and hands dirty).

  During the body brace work, 51Kid wandered into the garage one day and said she thought she was ready to learn to weld. Needless to say, work on the car stopped cold right there for that day!

  Within a half hour that first day, she was doing decent tacks with the MIG. The next weekend, she spent another half hour or so doing tacks on 16 gauge, and was consistently getting very good tacks.


  If you look close, you can see that there are welds from both the top and bottom of the workpiece. Notice the ones from the other side have excellent penetration.

  When we get back to the sheetmetal work on the inside of the car, I'm going to have her do some welds that will actually be putting the car back together. It's starting to become more of a true family project!